Before fitting exercise bandages, the horse's legs must be clean and dry. Whilst putting the bandage on, always crouch down by the side of the leg, never sit or kneel.

Tie the horse up.
Crouch down on the outside of the horse’s leg and position the padding at the correct height. It should be fitted slightly above the bottom of the knee or hock, and finish at the base of the fetlock.

Wrap the padding securely around the limb, ensuring the whole area that needs bandaging is covered.
Ensure the overlap seam is fitted on the outside of the leg, faces backwards, and sits in the hollow of the leg between the bone and the flexor tendons.
The padding should be wrapped around the leg as tightly as possible.
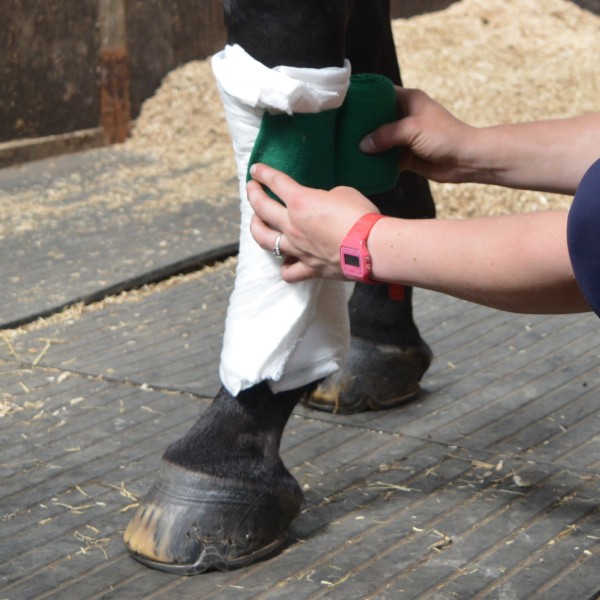
Keeping the under padding secure, place the bandage roll against it just below the knee or hock.
The bandage should be unrolled following the direction of the padding joint, towards the back of the leg.
Make sure the padding does not twist around the leg at this point.
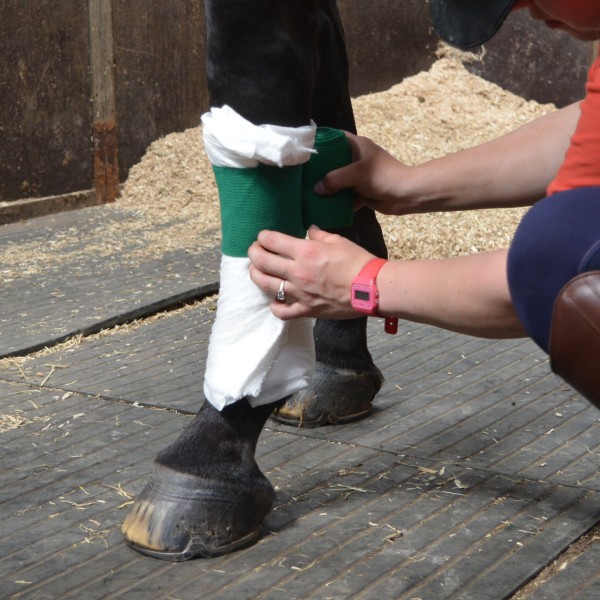
Keeping an even pressure, wrap the bandage around the leg over the previous part of the bandage. This will secure the bandage.

Begin to unroll the bandage, working downwards in the same direction as the padding so the bandage overlaps the previous lap by half the width. Ensure you maintain an even pressure.
To maintain a firm tension on the bandage, only apply pressure on the front of the leg against the cannon bone. The reason being is the flexor tendons at the back of the leg are not stabilised by bone so applying excess pressure on them may cause damage.
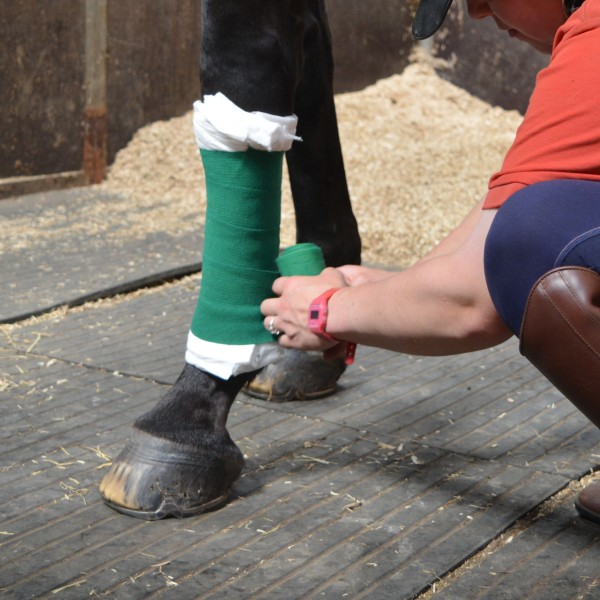
Maintaining the tension, continue bandaging downwards until you reach the middle of the fetlock. The padding may need to be re-adjusted at this point to ensure the joint remains on the outside of the leg.

Keeping the same pressure, begin to bandage back up the leg. Once you reach just below the knee or hock, bandage back down the leg again until you reach the end of the bandage.
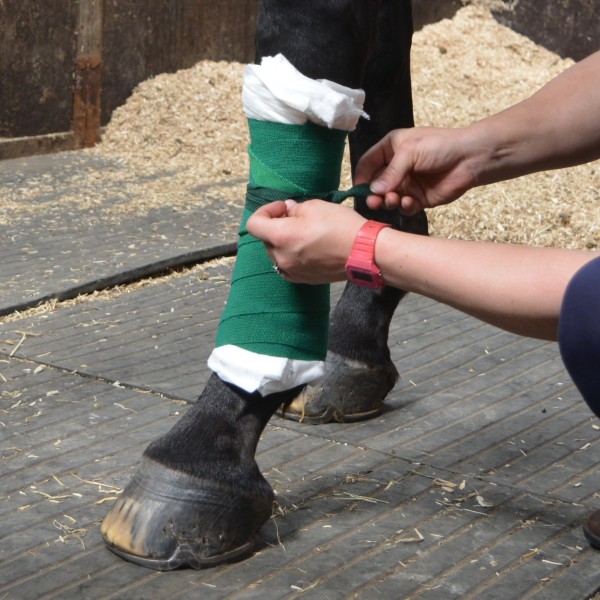
Once you reach the end of the bandage secure it with either the tapes or velcro, at exactly the same tension the bandage is fitted so it does not interfere with the circulation. The fastenings should be fitted on the outside of the leg, and never around a joint.
Velcro fastening: Fasten the velcro together.
Tie strings: Ensure there are no twists in the strings, wrap the ties flat around the bandage and secure with a bow. Tuck the ends in so that they cannot undo.
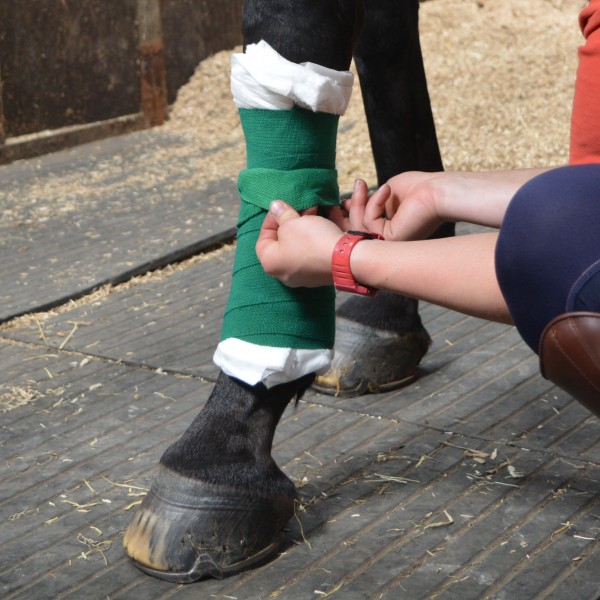
If tie fastenings are used, for extra security pull the upper part of the bandage over the ties.

Test the tension of the bandage: push 1 finger down the top of the bandage between the padding and leg. You should be able to snugly get one finger down it.
If the bandage is fitted too loose the gap will be too wide between the leg and padding. This will cause the bandage to slip which could lead to pressure points, scaring or bruising. A loose bandage will also not offer support to the leg and could be dangerous as it could cause the horse to trip or fall
If the bandage is fitted too tightly you will struggle to get one finger down between the bandage and leg. This can lead to pressure points, scaring or bruising. It can also interfere with the circulation, or cause damage to the tendons and ligaments.